WPPizza – Pdf Invoices
Description / Overview
- Attach Pdf Invoices to any WPPizza order email.
- Attach Pdfs to customer, shop, and/or any other email recipient when a purchase is being made.
- Pdfs can contain different information for each recipient group
- Download Pdf Invoices – in Bulk – from your WPPizza Reports Screen
- Allow registered users to download PDF invoices from their purchase history
- (Re-)Send PDF Invoices from your WPPizza->Order History
- Utilises the DomPdf Library (https://github.com/dompdf/dompdf) to generate the PDFs
Requirements
- WPPIZZA 3.9.5+
- WordPress 4.0+ (although lower versions will probably also work)
- Php version 7.1+
- Php DOM extension (usually enabled by default)
- Php GD extension (usually enabled by default)
- Php MBString extension (usually enabled by default)
- PhpZip Extension for download of invoices in bulk (usually available by default)
- Read/Write access to the plugins “dl/” , “font_cache/” and “lib/dompdf/lib/fonts “directory (typically the case when using the WordPress to install the plugin)
- Allow_url_fopen set to true if you want to embed remote files such as images
- Enough resources available on the server to generate PDFs (even more so if you want to export multiple PDFs)
- Due to various libraries included the plugin is quite big in size (~10MB), make sure your server allows uploads of this size when installing.
Installation
- Install by uploading the zip file in the normal wordpress manner from withing the plugin screen and activate. (Highly recommended for appropriate directory permissions)
Recommended Setup (to get you started)
For your own sanity and future flexibility I would strongly recommend you start by following the guidelines below. If you want, you can of course use any already existing print template, but you will loose certain flexibilities and might also run into issues depending on how much you altered the default settings of your template
- Go to “WPPizza -> Templates -> Print Order” (*NOT E-mails*) and add a new template by clicking on “add template”.
- For maximum flexibililty, leave format as “HTML” – you can change this later of you wish
- Name the template “Invoice” or “Customer Invoice” or similar – this will be the filename used for the generated PDF’s
- Enable the relevant fields/sections you want to render in the PDF (I would suggest something like in this screenshot – you can change this at any time later if required.)
- Note: the way taxes will display is dependent on your tax settings in “WPPizza -> Order Settings -> Taxes” (screenshot)
- Save
- Go to “WPPizza -> Localization -> PDF Invoices” and set the localization strings as required – or leave them as is (you can change these later if you want)
- For template variables available, refer to the help screen on that page
- Save
- Go to “WPPizza -> Settings-> PDF Invoices”
- Select the template you created above for Shop and/or Customer.
If you are sending the same E-mail template to the shop *and* the customer – check your settings in “WPPizza -> Templates -> E-mails” – you must set a PDF shop template for the customer to receive a PDF, as the same email is being sent to both. If you have setup different E-Mail templates, you can also set different PDF templates – or none at all – to be sent to each recipient - Set your desired PDF format
- Use the preview button to preview the PDF that would be generated
- If required, add additional CSS declarations in the CSS textarea (refer to the documentation)
- The “Customer – CSS” has a default style added that will add a “Paid” (if an order was prepaid or marked as “delivered” in the order history) / “Refunded” background image. You can alter – or delete – this declaration of you so wish
- Use the css preview button next to the css textarea for viewing the html/elements structure – use your browsers element inspector. Note: the font displayed here will be a generic font, not used for the actual PDF generation
- Most character sets are supported by the default font, but if your site is in Thai, Korean, Chinese or similar, try selecting from one of the extended character sets available
- When you are happy with it , save
- For more information, please also refer to the help screens available on the page
If you have set the same *Email* template to be used in “WPPizza -> Templates -> Emails” for the customer AND the shop, the PDF set to be sent to the shop will also be sent to the customer overriding your PDF settings applied to the customer – OR NONE AT ALL if no template is selected to be sent to the shop (as it will be the same email cc’d to the customer)
To send *separate* PDFs to the shop and customer (or only to one of them), you must also set up separate *Email* templates for the shop and the customer in “WPPizza -> Templates -> eMails”
Language/Character Support
Some languages might require the fonts to be set to one of the extended character sets in the plugin
- Tested with: Western/Latin, Cyrillic, Arabic, Turkish, Greek, Chinese, Thai, Vietnamese, Japanese, Korean, Hindu
- Please note that the output of the non-western fonts above – when testings – looked fine to me, but as I do not speak (or write for that matter) any of those languages, please let me know if you have issues with a particular language / character set
- For questions about the support of other languages not mentioned above (though they might be supported regardless) – contact me
Known Issues / Code Examples / Filters
- Please also refer to the docs available at https://docs.wp-pizza.com/developers/?section=pdf-invoices
Support
For support please visit the “Support Forum”
Screenshots
admin settings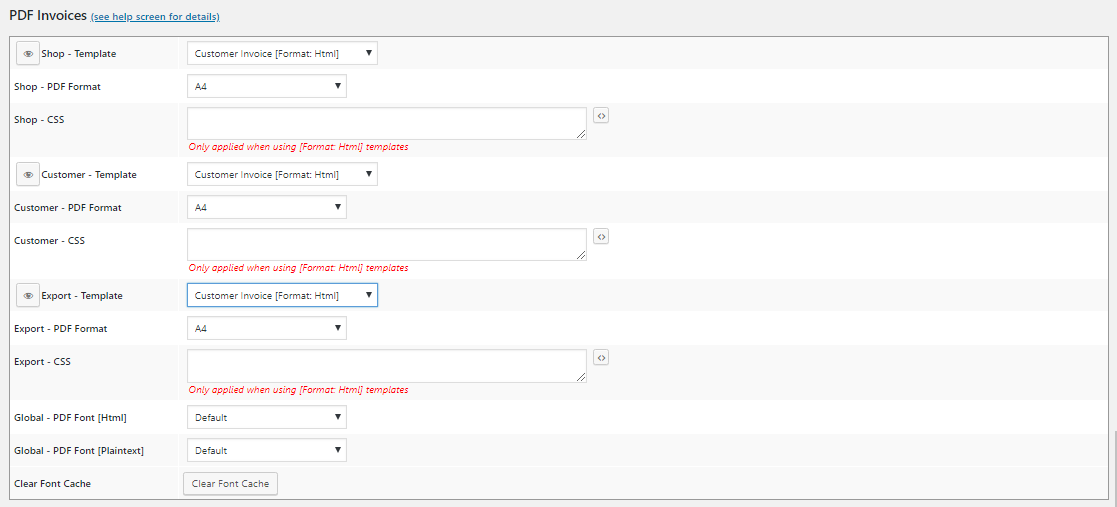
|
admin settings help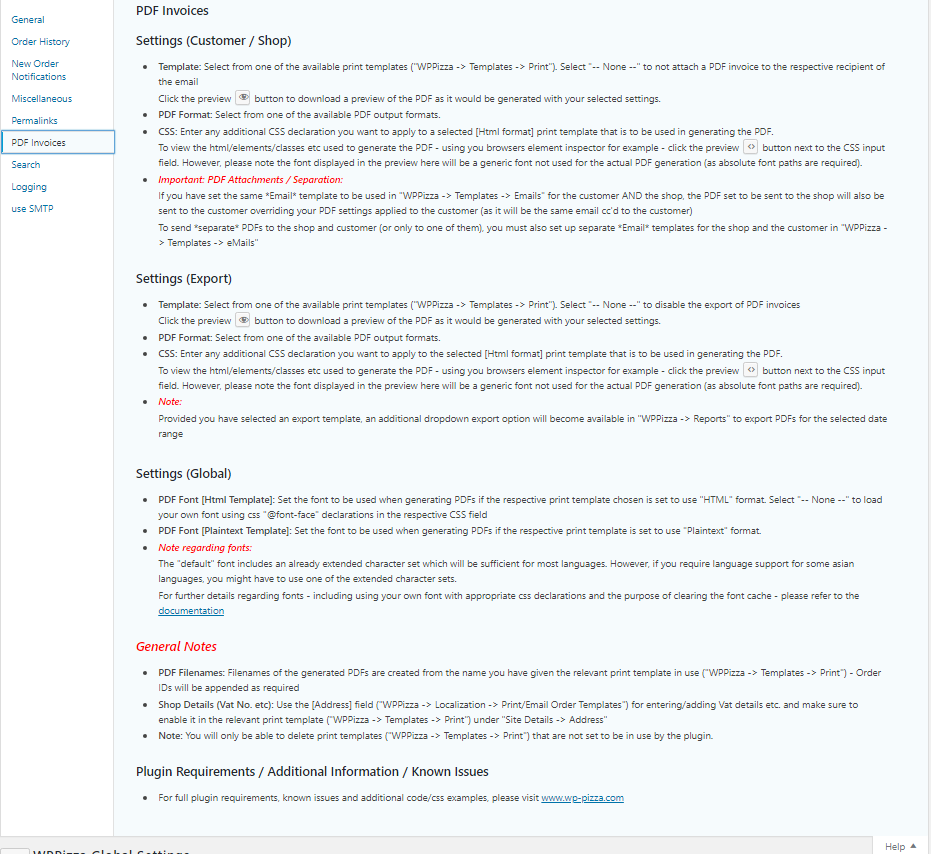
|
admin localization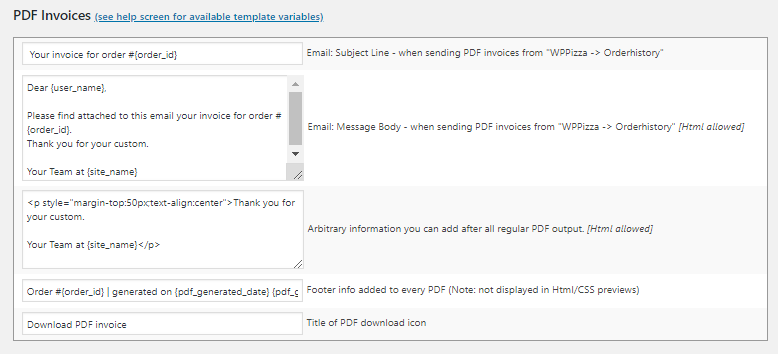
|
admin localization help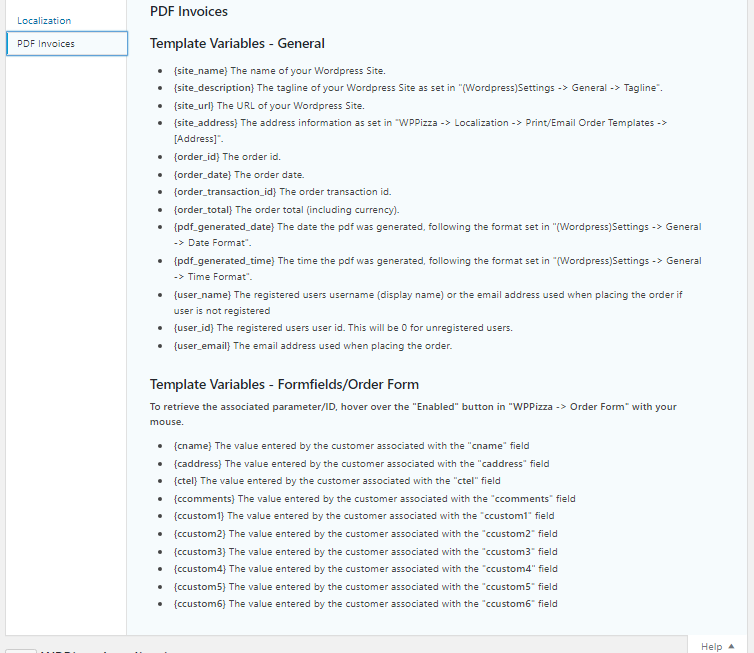
|
admin order history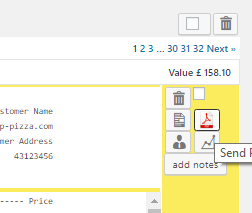
|
admin export |
frontend – purchase history
|
a generated PDF (Html Template) with Background image for a delivered order View / Download |
PDF Screenshot (Html Template) – with header image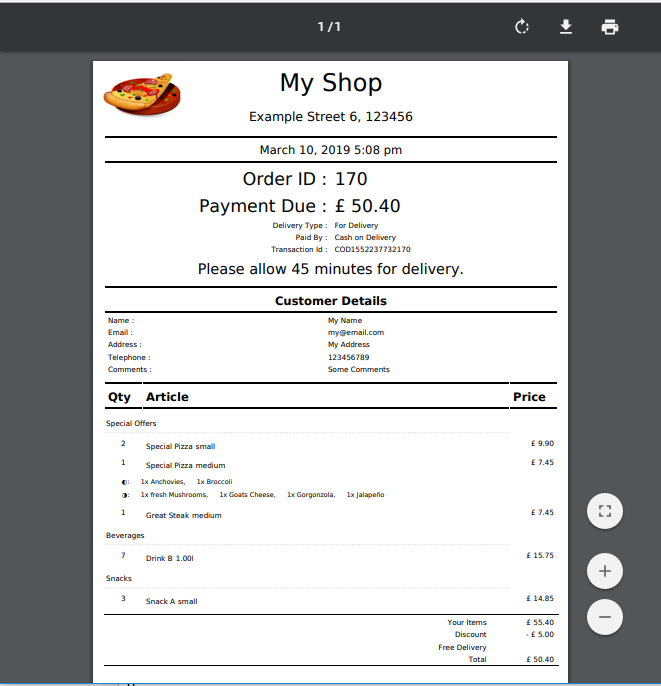
|
PDF Screenshot (Plaintext Template)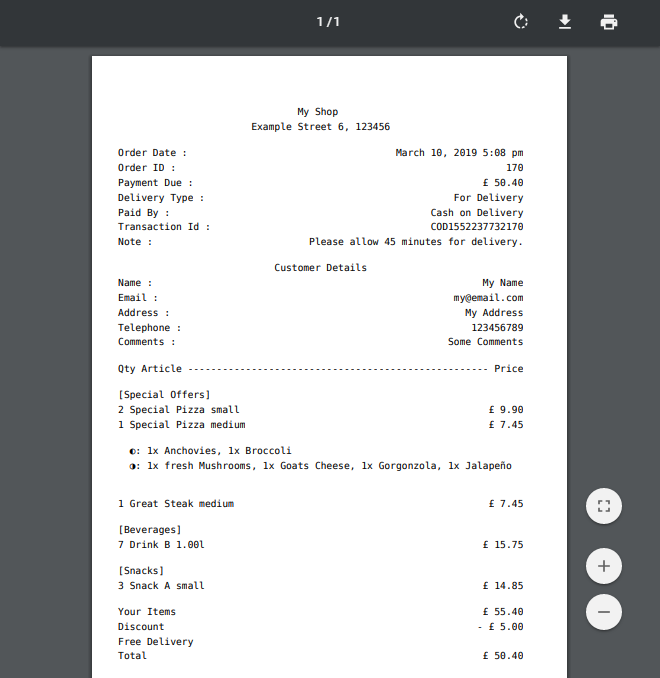
|